Sunday, September 6, 2009

East Meets West - Pork Satay/Kutupat Vs Hot Chili Chicken Chipolata HotDog

It is very fortunate to live in a heartland whereby you have 5 different supermarkets located pretty close to each other as you will be spoiled for choice with different exclusive offers given. After rummaging through the offers this week I decide to whip up a East Meets West Saturday lunch today with the offer items I gathered on Friday. Hot Chili Chicken Chipolatas HotDog not exactly a True West (LOL) as I don't have hot chili at moment and substitute it with beef keema that I had cooked in excess.


Pork Satay/Kutupat Vs Hot Chili Chicken Chipolatas HotDog
  • 1 Gardenia Hotdog Bun (Hotdog Bun free from NTUC with Purchase 1 Loaf of Bread)
  • 1 Chicken Chipolata ($4.95 10 Pcs Chicken Chipolatas Promotion from Carrefour)
  • 1/2 Cup Mozzarella 
  • 5 Sticks City Pork Satay ($7.00 Promotion from Sheng Siong)
  • 2 Kutupat ($3.20 Promotion from Sheng Siong)
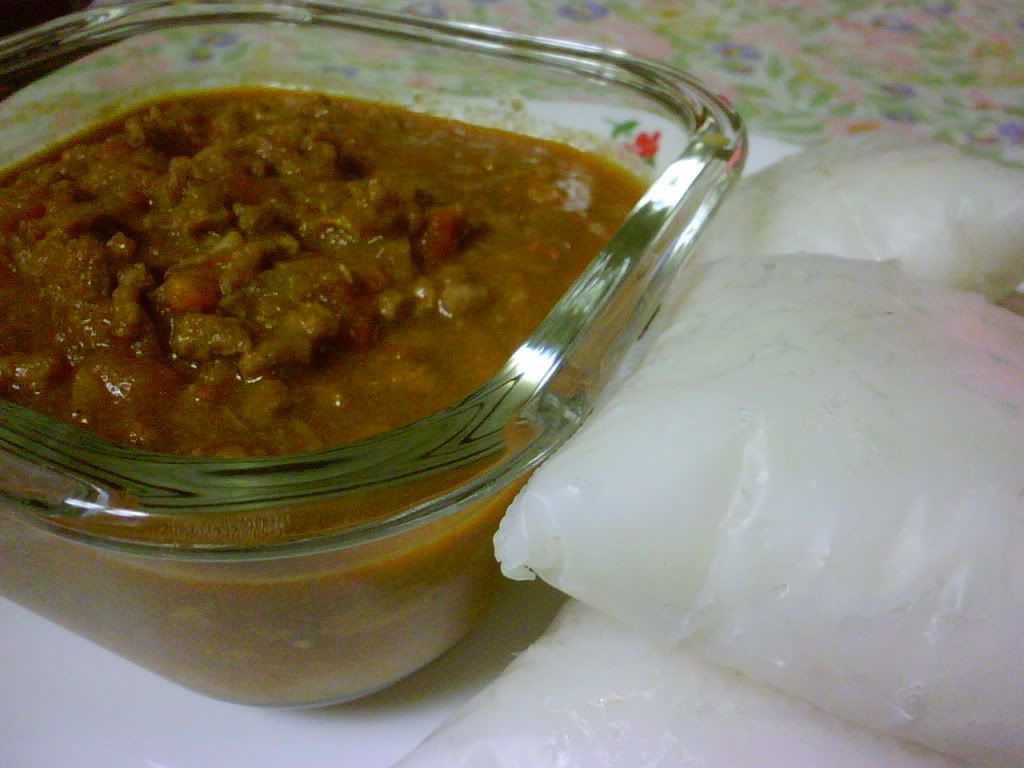
  • 1 Beef Keema (substitute for Hot Chili)

City Pork Satay are sold in a pack of 20 stick with peanut sauce. Empty the peanut sauce in microwave bowl and heat it under high settings for 11/2 minutes. Heat up the electric grill and coat it with oil for 5 minutes then grill the satay each side for 5 minutes and ready to serve. For cooking the Kutupat, boil a pot of water with salt added add in the kutupat rice pack sure it is fully submerge into the bowling water and boil it for 45 mins or more, turning it at times until it is fully bloated up. You can do it the day before as the kutupat need to cool down adequately so that you can cut it without the rice sticking to the knife.

Heat a frying pan with a drizzle of oil, fried the chipolata until the skin start to turn crisp. Slit the the hotdog bun length wise and insert the chipolatas into the hotdog bun. Drizzle the hot dog bun with Beef Keema and top it with mozzarella cheese. Microwave it under high setting for 1 mins till the cheese melts.

Beef Keema

Keema is one of staple dish in North Indian Cusine serve with Naan bread toast over a tandoor. I used to frequent one of my favourite North Indian stall at Sim Lim Square Food Court as the chef there allow you to customize the spiciness of the Keema according to your preference. Since the stall had relocate to Little India, I hadn't have Keema for years and decide to indulge my craving by cooking my own Keema.

 Beef Keema
  • 500g Minced Beef
  • 1/2 Cup Green Peas (can add Corn Kernel or Carrot to reduce the meatiness)
  • 2 Medium Onion or 1 Large Onion
  • 2 Medium Tomato Chopped
  • 1 2inch Cinamon Stick
  • 2 Bay Leaves
  • 4 Cloves
  • 4 Green Cardamon
  • 1 Teaspoon Garlic Mince
  • 1 Teaspoon Ginger Mince
  • 1 Tablespoon Coriander Powder
  • 2 Tablespoon Chili Powder (1 1/2 Teaspoon Chili Powder for less spicy)
  • 1 Teaspoon Cumin Powder
  • 1/4 Teaspoon Turmeric Powder
  • 1 Teaspoon Garam Masala
  • Salt
  • Cooking Oil
  • Da Bomb Hotsauce (Optional)
Heat a non-stick pot with 2 to 3 tablespoon of cooking oil, add in the bay leaves, cloves, cardamons and cinnamon stick and fried it till you smell the dry spice fragrance. Add in the chopped onion and fried together with the spice until it start to turn brown. You might add a bit of water if you find it too dry to facilitate caramizing the onion. After that, add in the chopped tomato and ginger and garlic mince to fry it further until the oil starts to separate.


After that, add in mince beef and fried it for 4 to 5 minutes. Add in the Cumin Powder, Coriander Powder, Turmeric Powder, Chili Powder and Garam Masala and stirred the mince beef till it is evenly coat with the powder spices for 1 minutes. Next you can stir in the green peas and cook for another 2 mins. If you find the keema too dry, add in half a cup of water cover with a lid and let it simmer. Finally, do a taste test on the Beef Keema and add salt accordingly to your palate. The beef keema I cooked lack the spiciness I craving for therefore I add 1 drop of spice it up to my liking. For those faint of heart of spiciness, you have just follow the original recipe.

Sunday, August 30, 2009

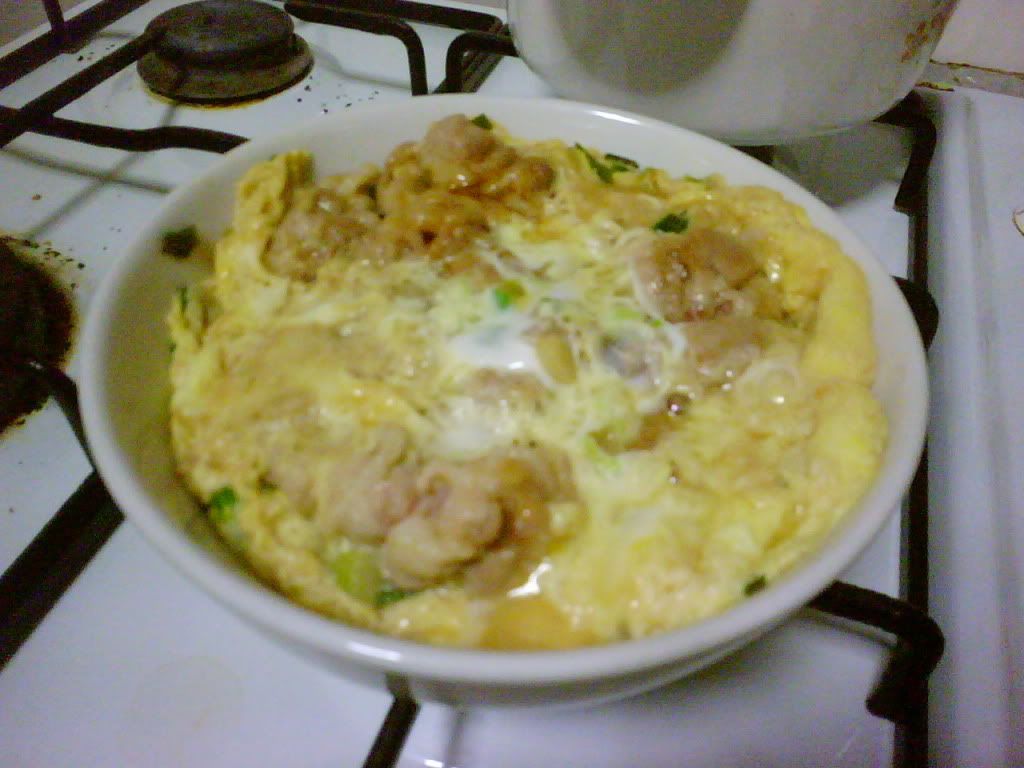
Donburi Series - Tamago Butadon

This Tamago Butadon recipe is really belated as it was created last tuesday. Due to heavy work engagement and busy "burning" TVB drama during the weekend, I'm only able to post it now.

If you like Yoshinoya's Beef bowl, you will like this Tamago Butadon as it taste similar with just a fraction of price. I'm quite surprised the Tamago Butadon turn out quite good as the pork slice is very tender and juicy just like Yoshinoya's beef slice.

 Tamago Butadon

  • 1/3 portion of Por Kee Shabu Shabu Pork (available at NTUC price $5.90)
  • 1 Sprig of Spring Onion
  • Oyakodon Season Mix (Available at Cold Storage or Mediya) or Chicken Stock
  • 2 Tablespoon of Sugar & Soya Sauce (If you don't have Oyakodon Mix)
  • 1 Bowl of Cooked Rice
  • 1 Teaspoon of Wine/Mirin
  • 1 Tablespoon of Cooking Oil
  • 70ml of water
  • 1 Egg
Heat up the donburi pan with 1 tablespoon of cooking oil and add in the finely chop spring onion. Next add in the Por Kee Shabu Shabu pork equally distributed across the pan (make sure you separate the pork slice and not big chunk as you might have difficulty in cooking them thoroughly). Add in the oyakodon season mix or 2 tablespoon of sugar and shoyu together with 1 teaspoon of mirin into the pork and add in 70ml of water. You do not need to wait for it to boil before you can pour in the whip egg. Make sure the egg is evenly distributed across the pan and cover it with the lid. The reason you do not need to wait for the pork slice to fully cook to add in the rest of ingredient as you dun wan the pork slice to become overcook and become tough.

After 5 mins, you can open the lid and you notice the egg is 90% cooked you can turn off the stove and gently slide it into the bowl fill with warm rice. For those who dun like it well done can run it through the microwave at high settings for 1 mins.

Saturday, August 22, 2009

Eight Treasure Soup (八珍汤)

Lately, easy to cook herbal soup is in fad and A1 is one of the first food manufacturer to jump into the bandwagon with Eight Treasure Soup (八珍汤) and Ten Whole Nourishing Soup (十全大补汤). Chinese herbs are grind to fine powder and put in filtered bag for easy cooking. So you no need to mess with the herbs quantity directly and after cooking you can easily remove it from the soup.

Today, I cook easy Eight Treasure Soup (八珍汤) to try haha. Those who verse in herbal soup will laugh their head off why a guy need Eight Treasure Soup as this soup is primarily for female to rejuvenate after their (big aunty come) also known PMS. On the contrary to such belief, this soup is suitable for all sexes, especially if you are anemic, or suffering from faint spell and poor appetite.

Eight Treasure Soup (八珍汤)
  • 3 to 4 pieces of Chicken Thigh
  • 1 Sachet of A1 Eight Treasure Soup ( Sold in Giant Megamart)
  • 1 Cup of Baby Carrot or Chopped Carrot
  • 2 Teaspoon of Salt & Pepper
  • 1 Teaspoon of Cooking Wine
  • Dash of Pepper
  • Microwave Glade Wrap (Optional)
The rule of thumb for "brewing" Chinese Soup, the meat used to brew the soup need to rinse through hot water to remove any traces of bloods or rawness that might affect the soup. I personally find this procedure reduce the soup flavour so I devise a procedure to overcome it. Soak or rinse the chicken thigh in water to get rid of the excess blood. Drain the chicken thigh dry, then add in 2 teaspoon of salt & pepper and 1 teaspoon of cooking wine and massage the chicken thigh thoroughly. Keep it marinate overnight. I enclosed 2 variants of making Eight Treasure Soup depends on individual liking.

Consomme Version:
Soak a sachet of A1 Eight Treasure Soup in water and put it at the base of the bowl. Cover it with 1 cup of carrot or baby carrots then add in the pre-marinate chicken thigh. Seal the bowl with Microwave Glade wrap and put in the steamer and steam it for 2 to 3 hours. Slowly, you will see strong consomme soup will form in the bowl.

Normal Version:
Soak a sachet of A1 Eight Treasure Soup in water and put it at the base of the bowl. Cover it with 1 cup of carrot or baby carrots then add in the pre-marinate chicken thigh. Put the bowl in a steamer and steam it for 2 to 3 hours. As the steam is condense directly into the bowl, the soup will not be as concentrate as the consomme version. 


Monday, August 17, 2009

Donburi Series - Oyakodon

Nowadays you can see donburi sprouting everywhere in the heartland food court and hawker centre with alluring signboard showing generous serving donburi at attractive prices as low as $3.50. For those who have tried it will say you don't get what you paid just like Mac Donald's fillet'o'fish burger's fish patties had shrunk so much that you could hardly taste any fish when you take a bite. I'm a donburi fan as it easy and fast to cook with everything in a big bowl and oyakodon is my favorite.

  Oyakodon
  • 1 Chicken Thigh
  • 2 Sprig of Spring Onion
  • Oyakodon Season Mix (Available at Cold Storage or Mediya) or Chicken Stock
  • 2 Tablespoon of Sugar & Soya Sauce (If you don't have Oyakodon Mix)
  • 1 Bowl of Cooked Rice
  • 1 Teaspoon of Wine/Mirin
  • 1 Tablespoon of Cooking Oil
  • 70ml of water
  • 1 Egg
You can prepare the chicken thigh beforehand slice it to chunk of 4 - 5 or slice it thinly depends on your preference but for my case chunky is the way to go. Marinate the slice chicken thigh with 1 teaspoon wine or mirin and a dash of salt and put it in container in fridge. Chop the spring onion 5cm or finer depending on your preference. You can do this all beforehand to cut cooking time when you get back from work.


You can use a small frypan with cover or get the donburi pan with cover at Daiso at $4 (cover & pan). I got the Daiso donburi pan which is pretty unique as unlike normal frying pan the pan handle is upright at 90°. Heat up pan with tablespoon of oil and add in the chopped spring onion and fry for 1 mins. Once you smell the aromatic fragance of the spring onion add in the chicken and fried for another 2 mins then add in Oyakodon Mix and 70ml of water and cover with the donburi pan with the lid until it boils. For those who dun have Oyakodon Mix can substitute with 1 Tablespoon of Mirin mixed well with 2 Tablespoons of Shoyu and 2 Tablespoon of Sugar. The measurement can be adjusted according to individual taste.


Beat up the egg and gently lace it on top and cover with the lid and let it boil for 2 mins and open the lid to check. Depends on individual, oyakodon serve in Japan normally the egg is not cook fully as they prefer the egg to be a bit runny. My case I prefer it more well cook, once ready you take the pan off the stove and gently slide it on bowl of hot rice and the Oyakodon is ready for the taking.


Sunday, August 16, 2009

Caipirinha - Ideal Cocktail For Summer

Recently, my friend "jio" as in invite me to go try the Brazil Churrasco (Fiesta Brasilia) at United Square with assurance the offering will be more authentic Brazilian than the Churrsaco (Carnivore) at Vivo City. True to his words, I had the best Churrsaco experience as Fiesta serve a very wide spread of meat and authentic Brazilian side dishes. What knock me off the rocker is Caiprinha serve in Fiesta Brasilia is extremely refreshing as it cleanse you of those feeling of oiliness you feel after binging too much. I believe it is a best summer cocktail for hot summer and I decide to share with you all.


Caiprinha
  • 2 Lime
  • Fine Sugar
  • Cachaca (for purist) or Vodka (if you cannot find any)
  • Sprite (for watered down version)
The version shown here is a watered down Caiprinha as I wanted it to be more suitable for people across the age as the alcohol content is so low it unlikely you can get drunk from it. First slice one of the lime into thin slices and put aside. For the second lime, cut into 4 quarters and put one of the quarter into a mug or drinking glass lined with 3 teaspoon of sugar. With a spoon, crush the lime so that the lime juice is released and mixed with sugar. Add in additional lime slices you cut earlier and fill the mug/glass full of ice. For original version, fill the mug/glass with Cachaca or Vodka and stir it well. For the watered down version, pour in Sprite then add in 1 tblespoon of Cachaca or Vodka. For those who want a stronger punch can add in more Cachaca or Vodka.

Sunday, August 9, 2009

Smoked Black Pepper Duck Toasted Sandwich


Rice & noodles dishes are the common dinner choice for average Singaporean in heartland heavily populated by food court or hawker centre. I personally don't like to eat the same kind of food that you can commonly find in food court or hawker centre.

One can say fast food can offer alternative economical dinner option, but the fast food serving have shrunk considerable over the years and their menu still stagnate with the same offering. Even new fast food item are rehash from their current menu without any novelty, so you left with not much choice or option.

Smoked Black Pepper Duck Toasted Sandwich is one of the few unique sandwiches I created so far for my dinner and managed to capture on my PSP camera. As most of them tend disappear into my stomach way before they get a chance to be photograph. LOL     


Smoked Black Pepper Duck Toasted Sandwich

  • 12 Pcs of KSP Smoked Black Pepper Duck (no longer retail in Sheng Siong try contact KSP)
  • 1/2 Tomato Sliced Thinly
  • 4 Pcs Bread
  • 1 Hard Boiled Egg Sliced
  • 2 Slice of Cheddar Cheese
  • Sandwich Maker (Any Brand)
For those who frequent Saizeriya (an economical italian/western restaurant located at Liang Court) will notice there is a smoked duck in their menu. The smoked duck offer in Saizeriya is source from KSP. By sheer luck, I manage to purchase it from Sheng Siong during the CNY period. As it's no longer retail in Sheng Siong, I take great care not to deplete the smoked duck too fast and keep some even until now.


Boil the egg with Burton Egg Timer until it hit Medium indicator and chill it with cold water and peel it. Use the egg slicer to get equal portion of egg slices. For the smoked duck, you need 6 slice with 2-3mm thickness as too thick, one will find the smoke duck too overwhelming in the sandwich.

With sandwich maker, place in the following order bread, smoked duck, slice tomato, slice egg, cheese and finally the bread. Close the sandwich maker cover and power it and toast until slight brown. There you have a hot tasty sandwich as alternative meal for your dinner with just 15 mins cooking time.